PREP TIME: 20-30 Minutes
COOK TIME: 35 Minutes
SERVING: 16

Nature’s Legacy proudly works with midwest farmers to bring quality and nutrient dense ancient grains to your table. They turn these specialty grains into high performance flours at their state of the art milling facility in located in Hudson, MI.
Tenera Grains is best known for our ancient grain granola, Teffola, which we have passionately crafted for health-conscious consumers. Our star ingredients, teff & buckwheat, are grown on our 7th-generation family farm in southeast Michigan using regenerative farming practices.

This signature spelt flour is milled from carefully selected seed varieties grown by Midwest farmers and chosen for their superior quality and performance. 100% whole grain spelt flour contains the germ, endosperm and the bran meaning more flavor and fiber while the white spelt flour contains just the endosperm for lighter, more subtle flavor for your baked goods.

Rye is great for Midwest farmers! Used as a cover crop, it helps balance the nutrients in the soil. After harvest and cleaning, the grain is milled - no bran is sifted out. This ensures that Nature's Legacy whole grain rye flour contains significantly more nutrients and flavor than refined wheat flour.
Trusted relationships with Midwest farmers ensure our ingredients are grown with care, using practices that prioritize soil health, crop diversity, and environmental stewardship.
Once the grain passes inspection it heads to the mill! This keeps the grains as natural as they are flavorful. No bleach, additives like potassium bromate or enrichments are used in the process.
These ancient grains taste the way nature made them. They deliver nutrients in a pure form our bodies recognize and easily digest. None of these ingredients have been hybridized or genetically modified.


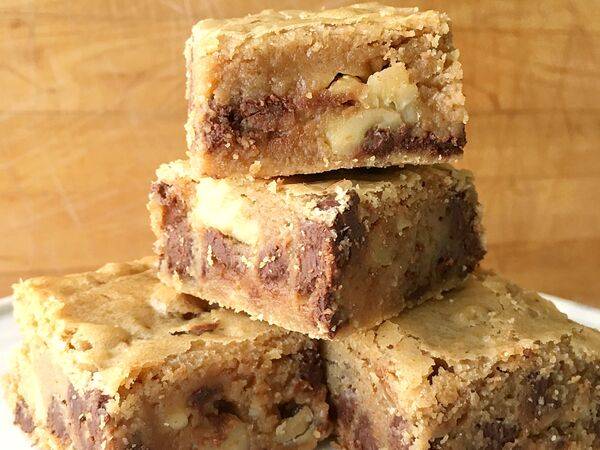
Brown Butter Spelt Blondies
PREP TIME: 20-30 Minutes
COOK TIME: 35 Minutes
SERVING: 16
INGREDIENTS
3/4 cup Whole Grain Spelt Flour
3/4 cup White Spelt Flour
1/2 tsp Kosher salt
1 1/2 sticks Unsalted butter
2 Eggs
1 1/2 cups Brown sugar
2 tsp Pure vanilla extract
1 cup Chocolate chips
3/4 cup Chopped, toasted walnuts
DIRECTIONS
1. Preheat oven to 350 degrees and line an 8x8 baking pan with parchment or foil.
2. Whisk together the spelt flours with the salt and set aside.
3. In a sauce pan, melt the butter over medium heat. Once it melts, keep a careful eye on it as the butter starts to foam and bubble. Once you start to see little brown bits on the bottom of the pan it is ready. Remove from heat and pour the melted butter into a large glass or metal mixing bowl and set aside to cool.
4. In a stand mixer with the whisk attachment whip the eggs and vanilla together. Add in the brown sugar and whip until the eggs and sugar combine into a very light yellow and it "ribbons" nicely back into the bowl when whisk is lifted up - see example here:
epicurious.com/expert-advice/fudgy-brownie-tips-recipe-article
5. Fold the egg mixture into the cooled, melted butter. Then fold in the flour mixture into the eggs and butter in two batches. Keep folding until the flour is incorporated and no dry pockets of flour remain.
6. Gently fold in the walnuts and chocolate chips until all ingredients are evenly distributed.
7. Scrape batter into prepared pan and spread out evenly.
8. Bake for 30 to 35 minutes. Adjust length if you prefer your blondies a little more under done or a little more well done.
9. Remove from the oven and cool completely on a wire rack.
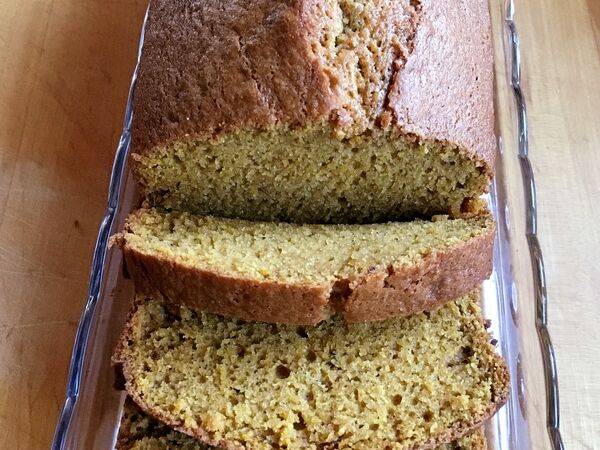
Old-Fashioned Spelt Pumpkin Bread
PREP TIME: 15 Minutes
COOK TIME: 60 Minutes
SERVING: 1 Loaf
INGREDIENTS
1 2/3 cup White Spelt Flour
1/4 tsp baking powder
1 tsp baking soda
3/4 tsp salt
1/2 tsp ground cinnamon
1/4 tsp ground cloves
1/3 cup butter
1 1/2 cups granulated sugar
1/3 cup water
1 cup pumpkin puree
DIRECTIONS
1. Preheat oven to 350 degrees
2. In a medium bowl, whisk together spelt flour, baking powder, baking soda, salt, and spices. Set aside
3. In the bowl of your stand mixer cream together the butter and sugar. Add in the water, eggs, and pumpkin and mix until combined
4. Add in flour mixture a little at a time until it is all incorporated, scarping down the sides often. Don't over mix.
5. Pour batter into a greased loaf pan. Place in the oven for about 60 minutes. It is done when a toothpick comes out clean.
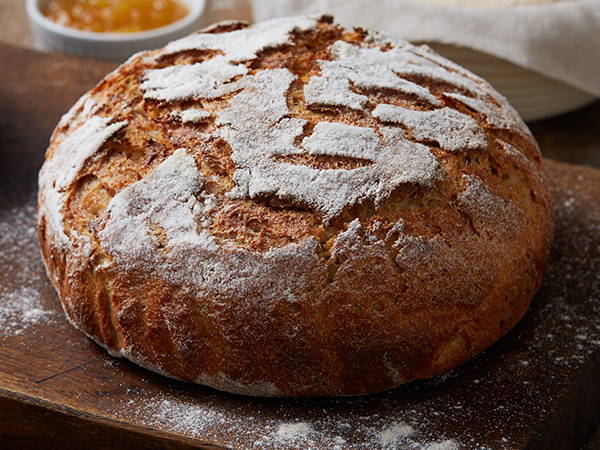
Rustic Rye Sourdough Bread
PREP TIME: 10 Minutes
COOK TIME: 45 Minutes
ADDITIONAL TIME: 10 Hours
SERVING: 1 Loaf
Recipe written by: Heartbeet Kitchen
INGREDIENTS
55 grams active sourdough starter
280 grams slightly warmer than room temperature water
(about 80-85 degrees F)
15 grams honey
100 grams fine rye flour (also known as light rye)
260 grams bread flour
40 grams whole wheat flour
7 grams fine sea salt
DIRECTIONS
1. Before beginning, it will be helpful to watch this SHORT VIDEO to see me make this bread, noticing that the dough will be stickier than normal because of the rye flour, but it will come together – you just have to trust!
2. Add starter, water, and honey to a bowl. Whisk thoroughly until combined, with a fork. Add flours, and mix together first with the fork to start to incorporate, then with your hands until a shaggy dough is formed, and the bits of flour left just disappear. Sprinkle the salt on top and do not mix in, just leave it on top. Cover with a damp cloth.
3. Autolyse: let dough sit for one hour, covered and undisturbed.
4. Bulk ferment: Now you will knead the salt that is sitting on top, into the dough for about 2 1/2 minutes. There is no precise way to do this, just think of working the dough through your hands and up against the bowl, push and pull. You will start to feel the dough relax a bit around 1 minute. Then leave the dough alone, covered, for 30 minutes. This counts as your first set of stretch and folds.
5. After those 30 minutes pass, perform a set of stretch and folds. Repeat 2 more times.
6. Now you will let sit, undisturbed and covered with a damp cloth, for the remainder of its bulk fermentation. You will know it is finished with its bulk ferment when the dough has risen about 75% (just short of doubling) in size, is smooth and puffy on top, with a few bubbles around the edges. It will not be as jiggly as some sourdough you've made before. I find this takes between 5-7 hours, depending on the temperature of your home. If the temperature in your home is above 72 degrees, this will be on the lower end; if it is cooler it will take on the longer end. Always go by the look and feel of your dough to know when it is finished proofing rather than time.
7. When finished with bulk fermentation, lightly dust your work surface with flour. Put dough onto the work surface, and pre-shape. Then let sit for 15 minutes on your work surface.
8. Then shape your dough using the video attached here as a guide.
9. Place dough into your flour dusted banneton, (or flour dusted linen lined banneton) seam side up. (Optional, you can wait 15 minutes after placing it in banneton, and pinch the perimeters of the dough into the center to hold the shape even more, called stitching.) The dough will now go through its final rise. You can do this on the counter, which will take about 1 1/2 to 2 hours at 70 degrees F for the dough to puff up and be jiggly. It will not double. OR you can do the final rise overnight in the refrigerator, with the banneton covered in a plastic bag or with a very damp cloth. You need this for holding moisture in.
10. Time to bake. Preheat your oven to 475 degrees F, with your dutch oven preheating inside the oven. When the oven is preheated, flip your dough out gently onto parchment paper and score your dough. If you did the final rise in the refrigerator, take it straight from fridge to scoring. You should score it cold, and DO NOT need to let it come to room temp.
11. Then put scored dough into the dutch oven on the parchment, and put cover on. Turn oven down to 450 degrees F and slide dutch oven in. Bake for 20 minutes, then remove cover.
12. Turn heat down to 430 degrees F, and bake for 20 to 25 more minutes, until crust is golden brown and crackly. Remove from oven, and remove bread from dutch oven and place onto a cooling rack.
Wait AT LEAST one hour to cool otherwise, the interior will be gummy.